 |
| Troll pieces and a complementary (how nice is that!) orc from Foundry |
keskiviikko 27. helmikuuta 2013
Wargames Foundry Troll Champion
I got my Troll Champion from Wargames Foundry yesterday. I don't know if this dude is going to see any gaming action, but the model was so funny looking so I just had to get it. Especially the face and thin body proportions are tongue-in-cheek sculpted and have personality.
perjantai 22. helmikuuta 2013
GF9 extra large rocky hill

I bought Gale Force 9 extra large rocky hill few days back as a symptom of my ongoing terrain obsession. I have not liked GF9 terrain very much, as they look clumsy and too bulky generally. The hill looked good at the box's cover, and the option would have been to buy foam and start carving, painting and flocking, so I picked the the easy way out, and threw money at the problem.
More river pieces

More river pieces are getting done. With these, I changed the process a little to fix the issues with the previous pieces, and to try out something new.
torstai 21. helmikuuta 2013
Mossy swamp trees and first pieces of river
 |
| Tree on the right is waiting for sepia wash |
tiistai 19. helmikuuta 2013
Terrain part 2.
So, here are the finished products, first the swamp.
I'm quite pleased of how this turned out, the water coloring and water/ground relation is pretty good.

I'm quite pleased of how this turned out, the water coloring and water/ground relation is pretty good.

Terrain for terrain's sake
I for some reason thought I'd need terrain at home even though I do my gaming in our club.
Because of this, and the reason that I'm bored in painting, I started making a few test pieces.
 |
| hedges and a berry bush in making |
After gluing, I soaked both pieces with watered down PVA, let dry and repeat. This is time consuming as it takes a long time for watered down PVA to dry. The delay is of course mitigated by starting another project to work on in between, im my case a swamp.
perjantai 15. helmikuuta 2013
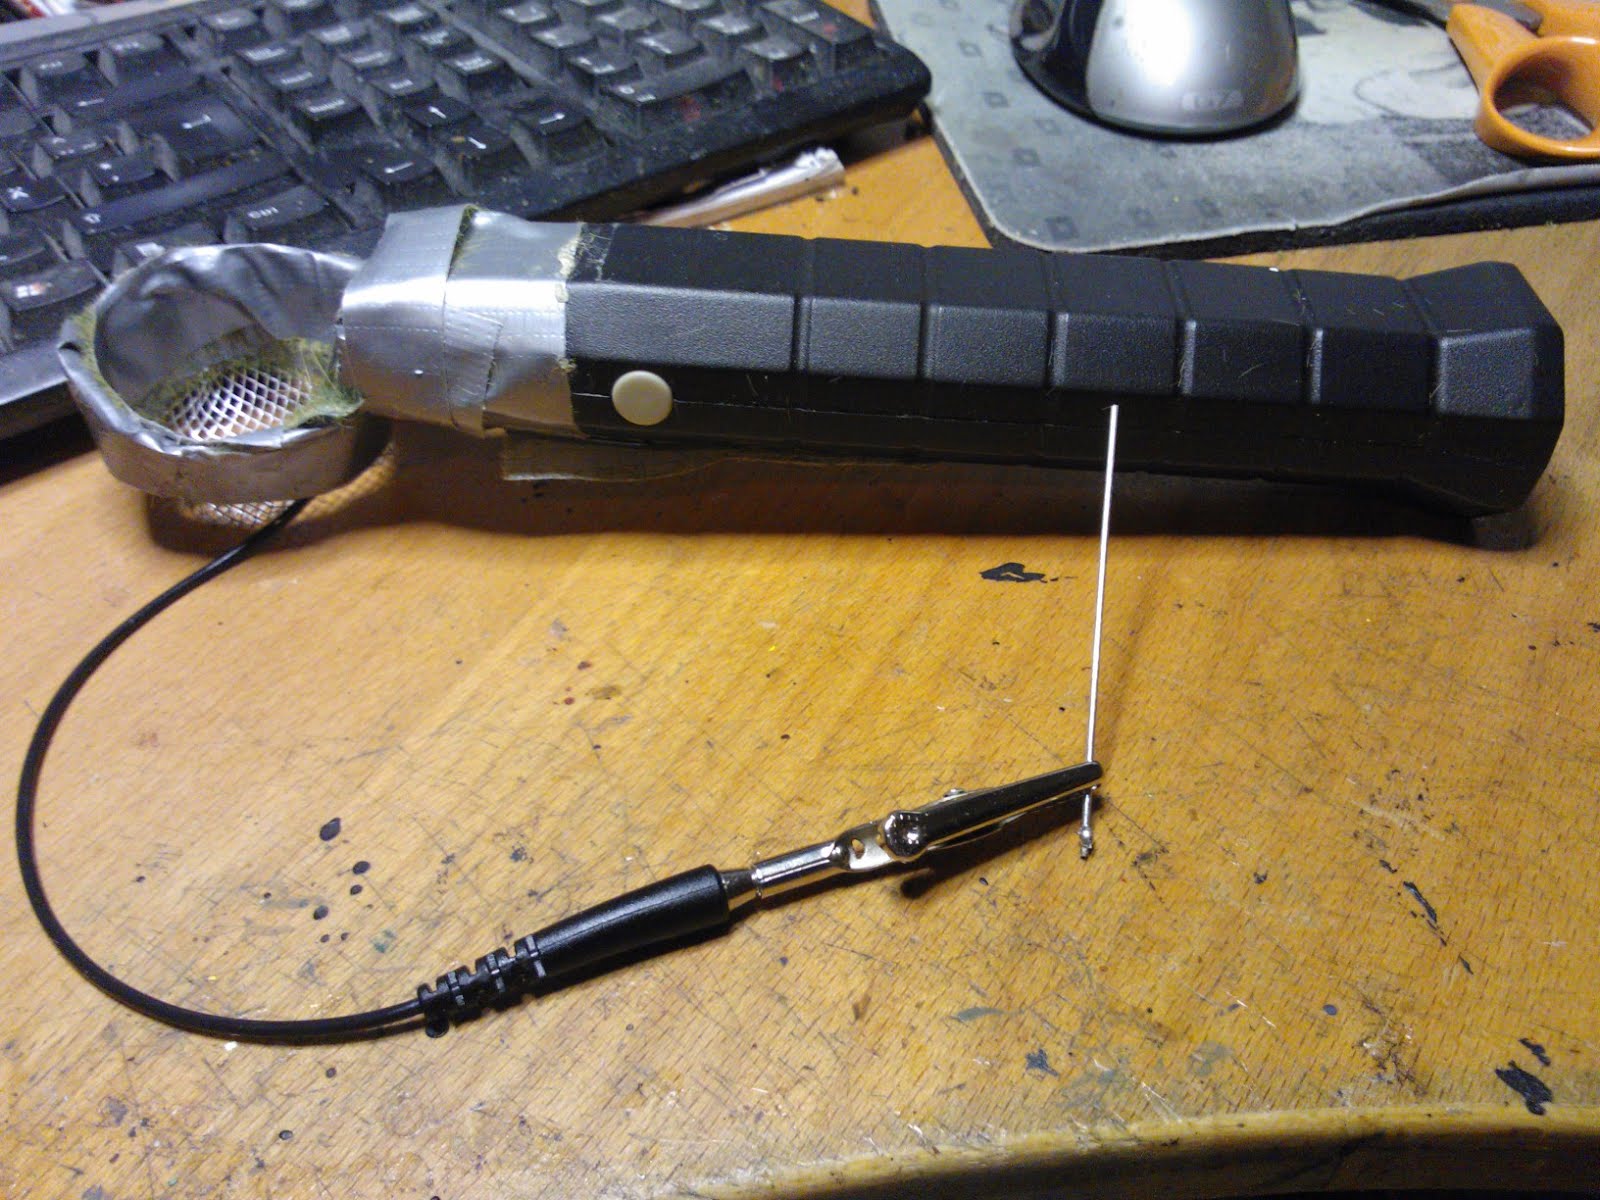
Home made Static Grass Applicator
After reading about Static Grass Applicators, I decided it was a time I try making my own. As a discalimer, I have never worked with electricity before, besides changing lightbulbs.
So, I bought McEnroe electric flyswatter for 6.50 euros, and opened the screws at the handle.
The insides consists of some sort of thingie from which 2 wires come out. These wires lead to the swatting part of the swatter.
I broke the swatting pad apart carefully, trying to preserve the wires as good as I could. I took a short piece of rubber covered wire that ended in clamp, and attached it to the other wire. I then made a basket from metal spike and metal net I had laying around, taped it to the handle, and attached the other wire to that construction.
To my suprise, the thing actually works!
 |
| McGyver couldn't have done better! |
Using the thing.
You have to apply glue to the part of the base you want the grass to stick to. Normally, I use PVA glue as it is quite sticky and fluid enough when mixed with a small amount of water.
Then put some static grass to the metal basket of the applicator, and take the free hanging wire, and electrify the general area of the PVA glue spot. I have clamped on a metal spike to make it easier to target the glue.
While keeping the electricity on, gently shake the static grass through the metal net to the glue, while keeping 1-2cm distance between the metal net and the clamp/spike -part. If the distance is longer, the static electricity is not enough to raise the grass, if it is shorter, the clamp and net will touch, resulting in sparks.
The static electricity will keep the grass upright while it is falling to the glue, so the end result is neater than without the applicator, it also helps to shake the grass through the strainer.
It is not very powerful as it is powered with 2xAA batteries, but it'll get the job done, and it was a fun project to build :)
Tilaa:
Blogitekstit (Atom)